
来源 https://halo.run/archives/halo-and-webp.html
部分图片体积较大,所以加载较慢,然后看到了这个
所以尝试优化图片输出
下载WebpServerGo
https://github.com/webp-sh/webp_server_go/releases
在此地址下载最新的Webp Server Go执行文件
赋予执行权限
赋予下载回来的文件执行权限
chmod+x webp-server-linux-amd64
生成配置文件
在webp-server-linux-amd64的当前目录生成配置文件
./webp-server-linux-amd64 -dump-config > config.json
然后修改生成的config.json为以下内容
{
        "HOST": "127.0.0.1",
        "PORT": "3333",
        "QUALITY": "80",
        "IMG_PATH": "/your/halo/path/.halo",
        "EXHAUST_PATH": "/your/halo/path/.halo/cache",
        "ALLOWED_TYPES": ["jpg","png","jpeg"]
}
使用Supervisor托管启动
添加Supervisor子配置文件
[program:webpserver]
command=/your/webservergo/path/webp-server-linux-amd64 --config=/your/webservergo/path/config.json
directory=/your/webservergo/path
autorestart=true
startsecs=3
startretries=3
stdout_logfile=/your/log/path/webpserver.out.log
stderr_logfile=/your/log/path/webpserver.err.log
stdout_logfile_maxbytes=2MB
stderr_logfile_maxbytes=2MB
user=root
priority=999
numprocs=1
process_name=%(program_name)s_%(process_num)02d
Nginx代理
我使用的docker部署的halo,然后使用nginx反向代理,所以此处贴出nginx的反向代理配置
打开halo博客的nginx反向代理,添加如下部分
location ^~ /upload/ {
        proxy_pass http://127.0.0.1:3333;
        proxy_set_header X-Real-IP $remote_addr;
        proxy_hide_header X-Powered-By;
        proxy_set_header HOST $http_host;
        add_header Cache-Control 'no-store, no-cache, must-revalidate, proxy-revalidate, max-age=0';
}
接下来就是测试啦
很简单,打开你的博客,再F12启动DevTool
效果如下图
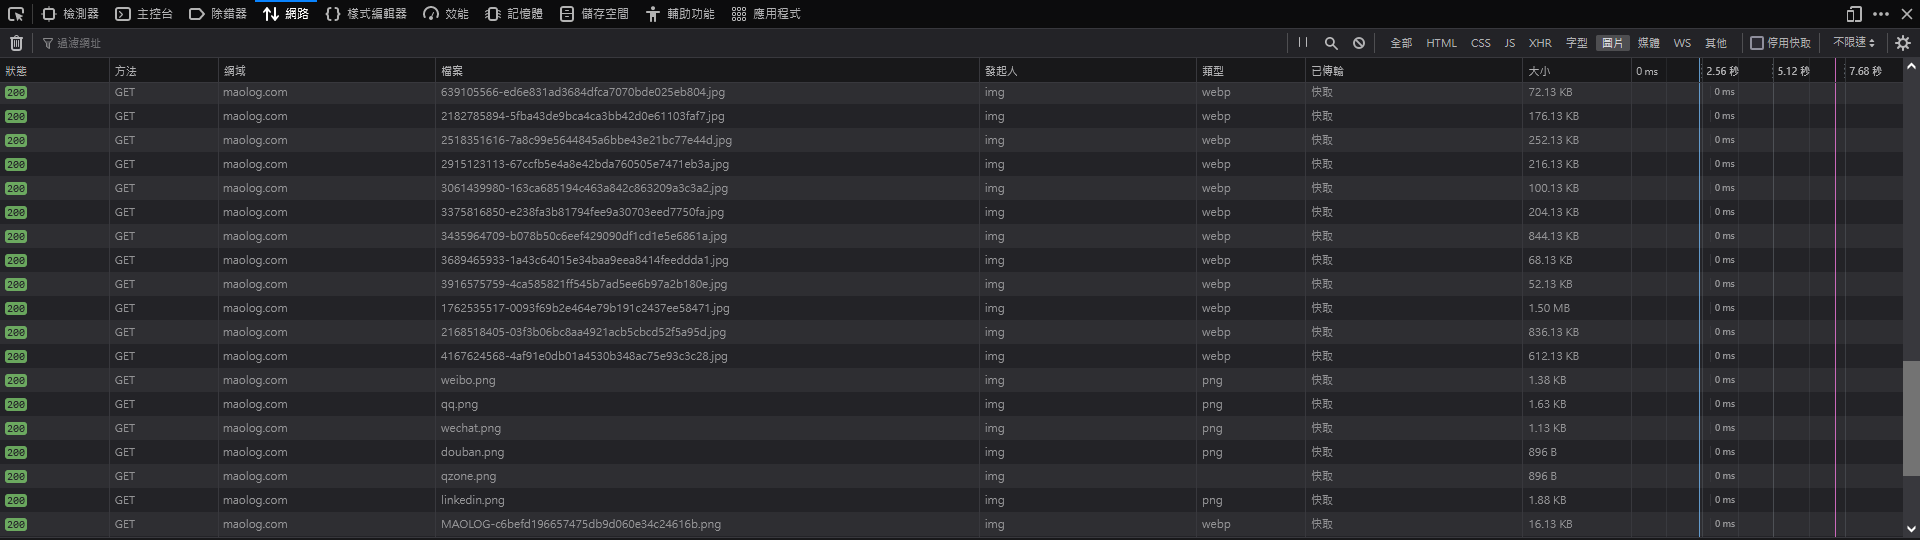
可以看到上传的图片都被转换成webp输出啦~
提醒
{
        "HOST": "127.0.0.1",
        "PORT": "3333",
        "QUALITY": "80",
        "IMG_PATH": "/your/halo/path/.halo",
        "EXHAUST_PATH": "/your/halo/path/.halo/cache",
        "ALLOWED_TYPES": ["jpg","png","jpeg","gif","bmp","mp3","mp4"]
}
以上参数中的ALLOWED_TYPES后缀可以放行其他类型文件,比如我的附件中会包含MP3和MP4文档,如果不放行,在代理后会出现File extension not allowed!的提醒,同时对应媒体文件也无法加载出来。